Ever spent an hour trying to nail the perfect polished updo, only for it to fall flat—or literally fall out? Yeah, us too. Whether you’re prepping for prom, a wedding, or just want to feel like Hollywood royalty on a Tuesday, updos seem simple in theory but can be tricky in execution.
In this post, we’ll break down *why* polished updo ideas matter, walk you through mastering them step-by-step, share pro tips and tools, and sprinkle in some real-life examples that might inspire your next big hair moment.
Table of Contents
- Why Polished Updos Are Worth It
- Step-by-Step Guide to Creating a Polished Updo
- Pro Tips & Best Practices for Perfecting Your Updo
- Real-Life Examples of Stunning Updos
- FAQs About Polished Updos
Key Takeaways
- Polished updos are versatile, elegant, and surprisingly easy to achieve with the right technique.
- Investing in quality styling tools and accessories makes all the difference.
- You don’t need hours—just strategic steps and proper prep!
Why Polished Updos Are Worth It
“Optimist You:” “A sleek updo will save me time and make me look effortlessly chic!”
“Grumpy You:” “Ugh, fine—but if I’m doing this, someone better bring coffee.”
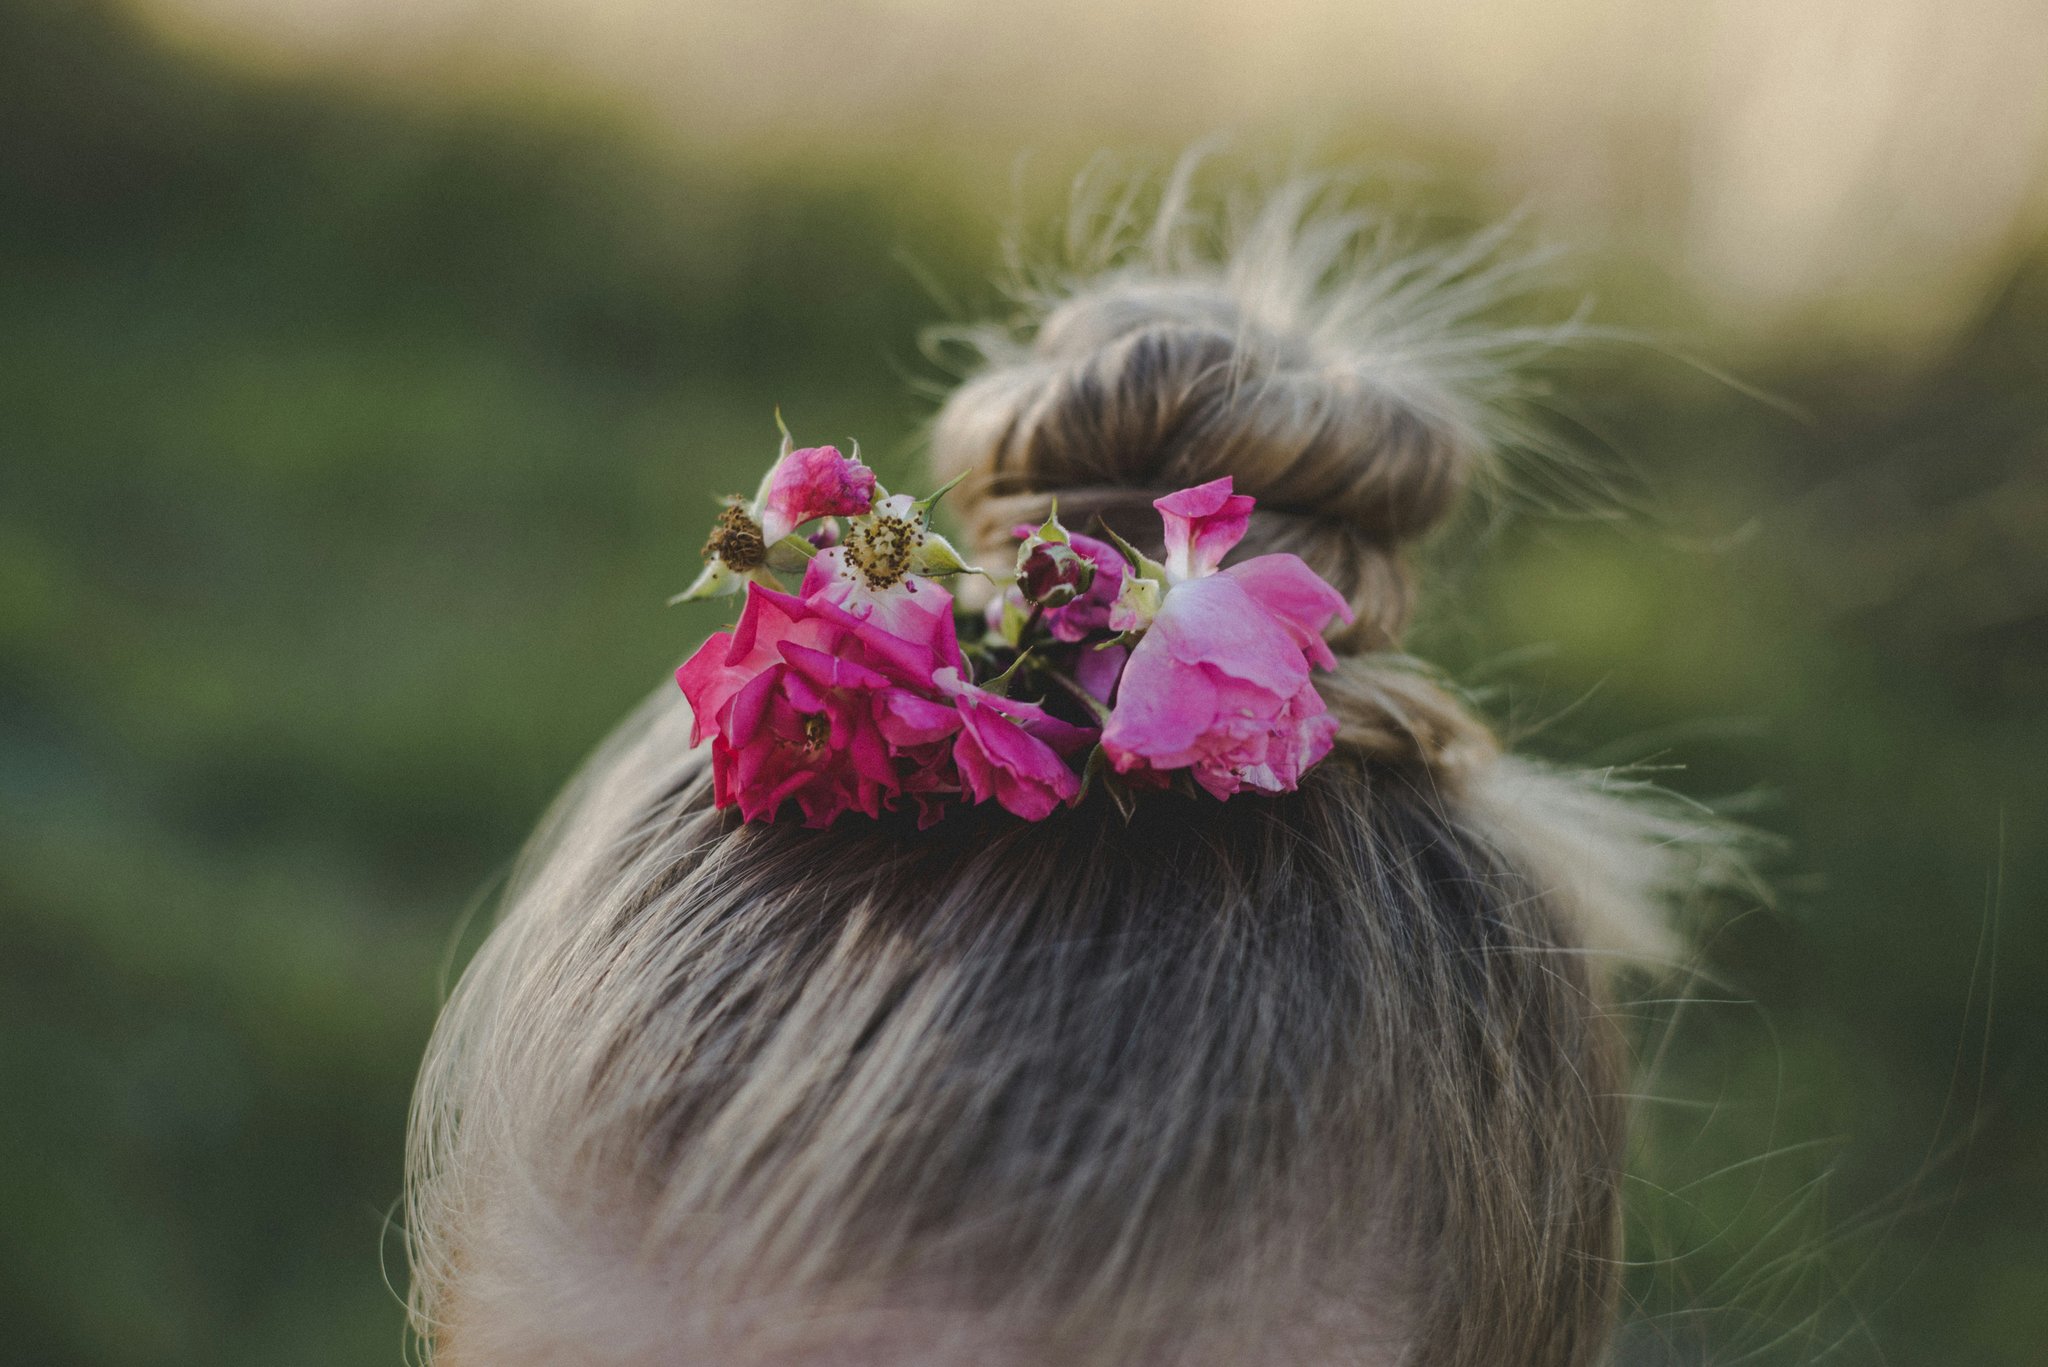
Jokes aside, polished updos aren’t just about aesthetics; they’re practical. They keep stray hairs at bay, protect your locks from damage caused by heat-styling, and add instant sophistication to any outfit. Plus, there’s something undeniably satisfying about transforming your mane into a structured masterpiece.
Step-by-Step Guide to Creating a Polished Updo
Step 1: Prep Your Hair
Start with clean, dry hair. A volumizing mousse or texturizing spray adds grip without weighing your strands down. Pro tip: If your hair is freshly washed, skip conditioner—it’ll be too slippery!
Step 2: Section Like a Pro
Divide your hair into manageable sections using clips. Work section by section, starting from the bottom layers upward. Trust me—you won’t regret taking the extra two minutes here.
Step 3: Twist and Pin
Twist each section loosely and secure it with bobby pins. The key is crisscrossing the pins for maximum hold. Oh, and avoid cheap plastic ones—they’ll betray you halfway through dinner.
Step 4: Finish with Product
Spritz lightly with a flexible-hold hairspray to lock everything in place. Bonus points if you add a shine serum for a glossy finish.
Pro Tips & Best Practices for Perfecting Your Updo
- Less is More: Over-accessorizing can ruin the polished effect. Stick to one statement piece, like pearl pins or a velvet scrunchie.
- Terrible Tip Disclaimer: DON’T use gum as an emergency hair tie. It’s sticky, gross, and will cost you more time than it saves.
- Rant Alert: Why do stores always sell cheap elastic bands in packs of 100 when we end up losing half of them within a week?
Real-Life Examples of Stunning Updos
Let’s talk inspiration. Picture Blake Lively’s iconic red carpet braided bun (chef’s kiss) or Zendaya’s slicked-back editorial twist. These styles prove that polished updos ideas translate across events and personalities.
FAQs About Polished Updos
Q: How long does a polished updo last?
A: With proper prep and product, expect your style to stay intact for 8–12 hours.
Q: Can I create a polished updo with short hair?
A: Absolutely! Use small elastics and mini buns to make magic happen.
Q: What tools should I invest in?
A: High-quality combs, sturdy bobby pins, and a strong yet flexible hairspray are non-negotiable.
Conclusion
We’ve covered why polished updos deserve a spot in your styling repertoire, walked through creating one step-by-step, offered tips, shared examples, and answered FAQs. Now go forth and conquer those updos like a champ!
And remember: Life’s too short not to look fabulous—even if it means untangling a bobby pin mishap along the way. 🌟
(P.S. Remember Tamagotchis? Your haircare routine deserves daily love, too.)
Star light
Bun tight
Shine bright