Ever spent an hour trying to tame your hair into an elegant bun only to end up looking like you stuck your finger in a light socket? Yeah, us too. The struggle is real when it comes to creating those picture-perfect elegant bun designs. But don’t worry—we’ve got your back. This guide will walk you through everything you need to know about mastering chic buns that scream sophistication without the stress.
In this post, we’ll dive deep into the world of elegant bun designs. You’ll learn the basics of styling, expert tips for flawless execution, and even some creative ideas to inspire your next look. So grab your combs, pins, and hairspray—it’s time to elevate your updo game!
Table of Contents
- Why Elegant Bun Designs Matter
- Step-by-Step Guide to Perfecting Your Bun
- Best Practices for Styling Elegant Buns
- Creative Inspiration for Elegant Bun Designs
- FAQs About Elegant Bun Designs
Key Takeaways
- Elegant bun designs are versatile, timeless, and perfect for any occasion.
- Achieving the perfect bun requires proper tools, technique, and patience.
- Simple tweaks (like accessories or texture) can transform a basic bun into something extraordinary.
- We’ll debunk common mistakes and provide pro-level hacks to make your life easier.
Why Elegant Bun Designs Matter
Let’s face it—hairstyles can make or break your vibe. While there are countless ways to style your hair, nothing screams “effortless elegance” quite like a well-crafted bun. Whether you’re heading to a wedding, office meeting, or just brunch with friends, elegant bun designs offer a polished finish that works for every setting.
But here’s where I confess my biggest fail: once upon a time, I decided to DIY an elegant bun for a fancy dinner date. Spoiler alert—it was more “messy bird’s nest” than “sleek chignon.” Lesson learned? Without the right foundation and tools, achieving elegance feels impossible.
Optimist You:
“Just follow the steps!”
Grumpy You:
“Ugh, fine—but only if coffee’s involved.”
Step-by-Step Guide to Perfecting Your Bun
Creating a flawless elegant bun doesn’t have to be rocket science. Follow these simple steps to achieve salon-worthy results at home:
Step 1: Prep Your Hair
Start by washing and conditioning your hair with products suited to your hair type. For added volume, apply a lightweight mousse or texturizing spray before blow-drying.
Step 2: Section It Out
Divide your hair into two sections—one upper section near the crown and one lower section. Secure each part temporarily with clips.
Step 3: Twist and Pin
Take the top section, twist it tightly, and wrap it around itself to form the base of the bun. Secure with bobby pins. Repeat with the bottom section, tucking stray strands neatly underneath.
Step 4: Set It in Place
Spray generously with a flexible-hold hairspray to lock in your design while keeping it touchable.
Quick Tip:
If your bun doesn’t feel as secure as you’d like, use small sections of hair ties wrapped discreetly around the base. Nobody will ever know!
Best Practices for Styling Elegant Buns
Here are a few golden rules to keep in mind:
- Prep Is Key: Always detangle your hair thoroughly before starting.
- Avoid Overloading Products: Too much gel or spray makes your bun stiff and unnatural-looking.
- Experiment with Accessories: Add embellishments like pearl pins or silk scarves for extra flair.
- Match the Occasion: A sleek low bun works wonders for formal events, while messy buns suit casual outings.
Rant Alert:
Can we talk about how frustrating it is when someone tells you to “just use bobby pins” without explaining *how* to place them?! Those tiny metal ninjas are useless unless positioned horizontally—not vertically. End rant.
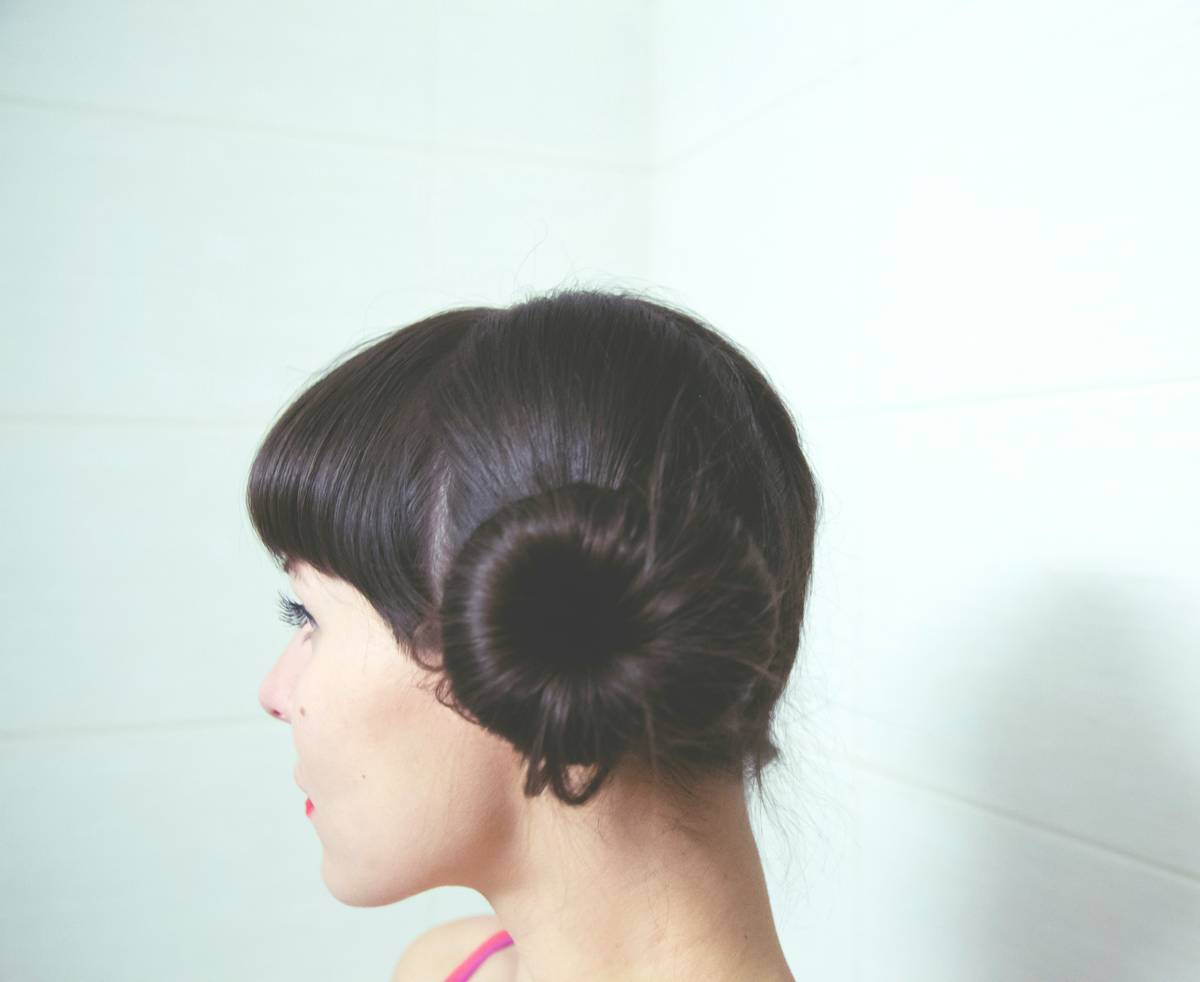
Creative Inspiration for Elegant Bun Designs
Want to level up your elegant bun designs? Check out these innovative takes:
- Braided Bun: Incorporate braids into your base for a boho-chic twist.
- Bubble Bun: Divide the ponytail into segments secured with elastics for a playful yet sophisticated look.
- Dutch Crown Bun: Combine Dutch braids wrapped around the head with a classic bun for regal vibes.
Side note: Don’t forget to try different textures! Sleek vs. tousled buns create entirely different aesthetics depending on your mood.
FAQs About Elegant Bun Designs
How long does it take to master elegant bun designs?
Practice makes perfect! Most people get comfortable within 2–3 tries. Just remember: It’s okay if your first attempt isn’t flawless.
What hair types work best for elegant buns?
All hair types can rock elegant buns! Curly-haired folks might benefit from smoothing creams, while fine-haired individuals may need volumizing sprays.
Are elegant buns suitable for everyday wear?
Absolutely! Depending on the style, elegant buns can transition seamlessly from boardroom meetings to gym sessions.
Conclusion
Congratulations—you’re now armed with all the knowledge needed to conquer elegant bun designs like a true hairstyling boss! Remember, practice is key, and having fun with accessories adds personality to your look. Now go forth and slay those hairstyles!
And because nostalgia fuels creativity: Like scrunchies in the ’90s, elegant bun designs never truly go out of style. 🌸